I'm embarrassed to admit that this ugly ironing board has been following me around for the last 8 years. We found it in our basement of our first house, which to me says it was too ugly for the previous owners to take with them. It is vintage, and we know I love vintage, but there is a point where no matter how vintage it is it's still gross and ugly. As you can see it has the ever elusive strawberry tree on it and is a lovely shade of poop green. God only knows why I have allowed this to hang around in this state for so long, I guess nobody but us ever really saw it. But things changed as I moved it down stairs this week to my new craft area. I mean the strawberry tree cannot coexist with Liberty of London, it just doesn't happen. But while it is ugly it is also very sturdy, folds up and is sort of a necessity if I want to sew. I figured chances were slim of finding a new cover for it since it seems bigger than the ones you can buy now. So I let the wheels of creativity turn, busted out some fabric from my stash and went to work. I figured why not share how I went about it with you lovelies.
Step one: Get some fabric, I used a cotton gingham, but ended up putting a second piece under the liner since I could see through it. So you may want to use a heavier weight home decor fabric. You need enough yardage to cover the length of your board plus about 8 inches. I used about 2 yards. My boards measurements were: 15x55 inches.
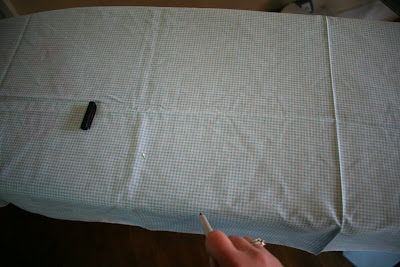
Step two: Lay your fabric on top of your board wrong side up. With a marking pen, sharpie, crayola or what ever is handy mark a dashed line around the shape of your board onto the fabric.
Step three: Once you get the shape marked lay it flat and mark four inches outside of your dashed line all the way around. You are basically adding a four inch seam allowance to the basic shape of the board.
Step four: Make a 1/4 inch hem all the way around and stitch. You could skip this step and just press it but I find it's easier to get the elastic through if you stitch it.
Step five: Fold down about 1 1/2 - 2 inches to make a casing, press and pin. Stitch all the way around leaving a 2 inch opening at one end. When going around the curved areas I sort of made little pleats to keep it rounded and take up the excess fabric. I'm sure their is another better way, probably clipping it or something like you do when making clothes. But this worked and doesn't look too bad so meh.
Step six: Attach a safety pin to one end of about 2 yards of 3/4 inch wide elastic. I found the wide elastic made it stronger and not so flimsy if that makes sense. Thread it through your casing. Sew the two ends of elastic together where they meet. Sew up the opening.
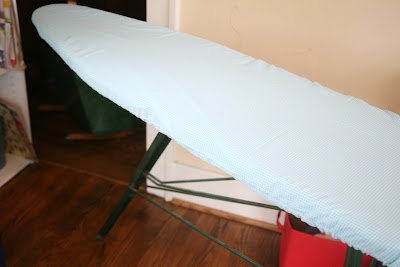
Step seven: Try on your new cover and if you're like me marvel at the fact that it actually fits and looks good!
Step eight: Have small children demand that you put a large piece of fabric over your hard work and allow them to use your ironing board as a fort!
So now I want to get the husband to spray paint the legs for me, because he does a much better job at it than I do. He has patience for an even coat, I pile it on and end up with crazy drips everywhere. But for now it is so much better than it was! I hope this helps some of you out to maybe cover an ugly board or one that has been burned. I swear it is so much easier to be inspired when you are working in a lovely space. If you have any questions I'm happy to answer them!


Beautiful end result!
ReplyDeleteDon't hate on the strawberry tree.
ReplyDeleteHahaha ! My kids would do the same thing ! They always take over what ever you've just been really proud to redo for yourself : P
ReplyDeleteGreat tutorial! I need a new cover on my board, not because its ugly but because its so thin and worn out that my clothes get the shiny pattern of the board ironed onto them
ReplyDelete